

Custom Apparel Quality Control Checklist: 2026 Guide
Table of Contents
- What You'll Need Before You Inspect
- Step 1: Build Your Custom Apparel Quality Control Checklist
- Step 2: Set Up AQL Standards and Inspection Levels
- Step 3: Inspect Fabric, Stitching, and Measurements
- Step 4: Catch Common DTF Printing Defects Before They Ship
- Step 5: Run Wash Test Procedures for Custom Apparel
- Step 6: Use an Apparel Inspection Checklist Template for Every Order
- Step 7: Package, Label, and Send Factory Feedback
- Frequently Asked Questions
Last Updated: September 21, 2026
What You'll Need Before You Inspect
A custom apparel quality control checklist only works if you have the right tools and paperwork on hand before the first box opens.
Here's what to gather:
- Approved pre-production sample, your gold standard for every comparison
- Spec sheet with POM (Point of Measurement) values and tolerance levels
- AQL chart for your inspection level
- Measuring tape, seam gauge, and a bright flashlight
- Defect tags and an inspection report template
- Camera or phone for documenting every issue
Step 1: Build Your Custom Apparel Quality Control Checklist
Start your custom apparel quality control checklist with three columns: what to check, how to check it, and what counts as a fail. That structure keeps every inspector consistent.
Step 2: Set Up AQL Standards and Inspection Levels
AQL (Acceptable Quality Limit) is the maximum number of defects you'll accept in a batch before rejecting it. It's the backbone of any serious garment inspection.
| Order Size | Sample Size | Major (2.5) | Minor (4.0) |
|---|---|---|---|
| 151-280 units | 32 | 3 | 5 |
| 281-500 units | 50 | 5 | 7 |
| 501-1200 units | 80 | 7 | 10 |
| 1201-3200 units | 125 | 10 | 14 |
Step 3: Inspect Fabric, Stitching, and Measurements
This is the section most guides phone in. Fabric, seams, and measurements are where custom apparel diverges from off-the-rack QC, because your spec sheet, not a generic size chart, defines pass or fail. Work in this order: fabric, then seams, then measurements, then decoration zones.
Fabric inspection
Inspect under 500+ lux lighting (a cheap LED shop light works). Pull at least 10% of the batch, or the AQL sample size from Step 2, whichever is larger. Check for:
- Weaving and knitting faults, dropped stitches, barré lines, slubs, and needle lines
- Pilling and snags, rub the fabric against itself; if it balls up in seconds, it will pill in the wash
- Dye lot consistency, lay units side by side under the same light. If two units in the same order read as different shades, that is a major defect, not a minor one
- Fabric weight (GSM), verify against the approved sample. A 5% GSM variance is common; more than that changes drape and print hand-feel
- Hand feel, does it match the approved sample, or did the mill substitute a cheaper yarn?
Seam and stitch integrity
Tug every major seam, shoulder, side, sleeve, hem, and neckline, with a firm two-hand pull. Then check:
- Stitch density, most cut-and-sew uses 10-12 stitches per inch (SPI) on main seams. Under 8 SPI is a red flag for thin, weak construction
- Skipped stitches and run-offs, even one skipped stitch on a stress seam is a major defect
- Seam puckering, rippling along the stitch line usually means tension was wrong on the machine
- Coverstitch and overlock quality, the hem should not curl, and the overlock should not be so loose you can see through it
- Bar tacks, every stress point (pocket corners, fly, side vents) should have one
Measurement and POM verification
Lay each garment flat on a hard table, smooth it by hand, and measure against your spec sheet's POM (Point of Measurement) values. Do not stretch the fabric to hit the number.
Typical tolerances for cut-and-sew knits:
- Body length, chest, and waist, ±½ inch
- Sleeve length and neck opening, ±¼ inch
- Pocket placement and print placement, ±¼ inch
Decoration-zone checks (the part most checklists skip)
Before you sign off on fabric and construction, mark the decoration zones on your checklist so the print or embroidery inspector has a clean handoff:
-
Print area flatness, no wrinkles, no fabric distortion from the press
-
Embroidery backing, cut-away or tear-away should be trimmed clean; loose backing shows through on light colors
-
Zipper and button plackets, aligned so decoration does not sit crooked after the garment is closed
-
Fabric hand feel, does it match the approved sample?
-
Color fastness, rub a damp white cloth on dark fabric; if dye transfers, flag it for a wash test
-
Trim and thread trimming, no loose ends over a quarter inch
-
Labeling requirements, care tags, size tags, and country of origin present and correct
Step 4: Catch Common DTF Printing Defects Before They Ship
Common DTF printing defects show up fast under good light. Check every print before it leaves the table.
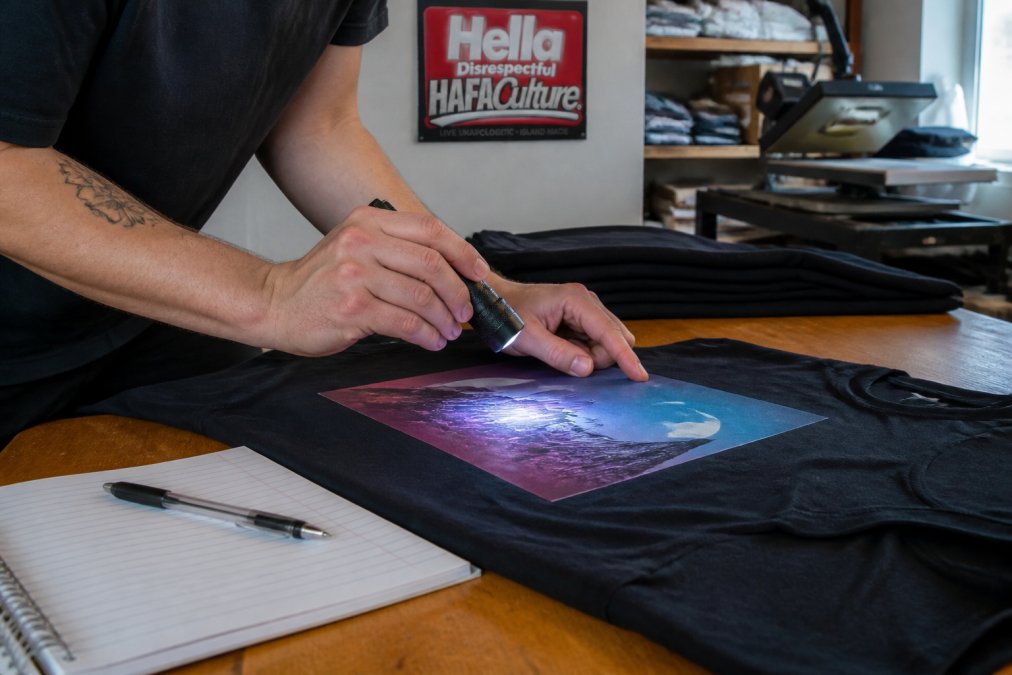
The big ones to watch for:
- Cracking or peeling along print edges
- Color shift from the approved proof
- Bubbling or lifting where the film didn't press flat
- Misalignment on chest or back placement
- Incomplete transfer with visible film residue
Step 5: Run Wash Test Procedures for Custom Apparel
Wash test procedures for custom apparel are the only real proof that a print will survive real life. Skip them and you're shipping blind.
After each cycle, check for:
- Print cracking, fading, or peeling
- Shrinkage beyond your tolerance
- Color bleed onto light areas
- Stitching that pulls apart at stress points
Step 6: Use an Apparel Inspection Checklist Template for Every Order
An apparel inspection checklist template keeps every order consistent, whether you inspect ten units or ten thousand. But a paper template only gets you so far, the real edge is running your checklist through digital QC tools so defect data compounds across orders instead of dying in a filing cabinet.
What your template must capture
Build one master template and reuse it for every supplier. At minimum, each inspection record should include:
- Order number, PO date, and inspector name
- Supplier, factory line, and production date
- Sample size and AQL level used (e.g., AQL 2.5 major / 4.0 minor)
- Defect log with photo, defect class (critical/major/minor), and count
- Measurement log with POM values and actuals
- Pass or fail result with a signature line
- Notes and a fix request for factory feedback
Going digital: QC apps and PLM integration
Most guides stop at "use a spreadsheet." That works until you have five suppliers and 40 orders a year, at which point you cannot answer basic questions like "which factory has the highest major-defect rate?" Digital QC tools solve that.
Three practical tiers, from cheapest to most integrated:
- Mobile inspection apps, Tools built for factory QC (many offer free tiers for small brands) let inspectors log defects on a phone, attach photos, and auto-generate a PDF report. Look for apps that support AQL sampling tables natively so you do not have to look up sample sizes by hand.
- Spreadsheet + cloud storage, A Google Sheet or Airtable base with a linked photo folder. Add a pivot table by supplier and defect class. This is the minimum viable digital setup and costs nothing beyond your time.
- PLM (Product Lifecycle Management) software, Full PLM platforms connect your tech pack, spec sheet, sample approvals, and inspection records in one system. Overkill under ~$250K in annual production, but once you are running multiple styles and factories, PLM is what stops spec drift.
The data loop that actually improves quality
- Defect rate by class, major defects per 100 units, tracked by factory
- First-pass yield, percentage of units that pass without rework
- Repeat defect types, if the same defect shows up three orders in a row, it is a supplier capability problem, not a batch problem
For small brands running custom orders, tools like Shopify's inventory and order guides can help you track batches alongside your inspection records, and most mobile QC apps export directly to CSV so you can merge the two.
Step 7: Package, Label, and Send Factory Feedback
Packaging compliance protects the garments after they pass inspection. Check that each unit is folded clean, bagged if required, and labeled with the correct size and style.
- Pass or fail result
- Photos of every defect class found
- Counts by defect type
- A clear fix request and deadline
Frequently Asked Questions
What are the most common defects to look for in custom DTF apparel?
Common DTF printing defects include cracked or peeling prints, color fading, misaligned edges, and adhesive residue. Check for these by inspecting each garment under good lighting after pressing. If you spot any of these issues, they likely stem from incorrect temperature, pressure, or peel timing during heat press application. Catching them before shipping saves you returns and protects your brand reputation.
How do you perform a wash test on custom apparel?
Wash test procedures for custom apparel involve washing a sample garment according to the care label instructions, usually in cold water with mild detergent, then drying on low heat. After each cycle, inspect the print for cracking, fading, or lifting. Run at least three cycles to simulate real-world wear. Document results on your inspection report to compare against your quality standards and adjust your printing process if needed.
What is the standard quality control process for custom t-shirt printing?
The standard process starts with a pre-production sample approval, then moves to bulk production with in-line checks. Use AQL standards to classify critical, major, and minor defects. Inspect fabric, stitching, measurements, and print quality. Finally, conduct a final random inspection before packaging. This custom apparel quality control checklist ensures consistency and catches issues early, reducing waste and returns.
How can small businesses maintain consistent print quality?
Small businesses can maintain consistency by using a detailed apparel inspection checklist template for every order, training staff on AQL standards, and keeping a log of defects and corrections. Invest in a heat press with accurate temperature and pressure controls. Also, request pre-production samples from your printer and perform regular wash tests. These steps help you deliver zero-defect shipments and build customer trust.
Quality control is the difference between a drop that sells out and a batch you can't move. Hella Disrespectful Clothing built its DTF lab around that idea, with no minimums, vibrant transfers, and optional heat press application so every piece ships press-ready. Start with a single print to test your design, then scale to gang sheets when you're ready. Get started with Hella Disrespectful Clothing and ship apparel your customers actually want to wear.