

How to Customize Plain Streetwear Tees
Table of Contents
- What You'll Need to Customize Streetwear Tees
- Streetwear T-Shirt Design Ideas That Actually Stand Out
- Hand-Drawn Graphics and Doodles on Plain T-Shirts
- Painting Designs on Shirts with Fabric Paint and Acrylics
- Best Apps for T-Shirt Design Before You Customize
- Custom DTF Transfers for T-Shirts: The Professional Finish
- Best Blank T-Shirts for Streetwear Customization
- Cutting, Reshaping, and Advanced Modifications
- Frequently Asked Questions
Last Updated: October 10, 2026
What You'll Need to Customize Streetwear Tees
Learning how to customize plain streetwear tees requires the right tools and materials. Preparation and material selection are as important as technique.
For hand-drawn designs, use alcohol-based or pigment-based markers labeled "fabric-safe." Heat-set with a heat gun or iron at 250°F to lock ink into fibers. Fabric markers work best on 100% cotton or cotton-blend tees.
For painting designs, use fabric paint, which stays flexible and won't crack with wear. Acrylic paint is cheaper but cracks after 20-40 washes. Both require heat-setting at 300°F for 3-5 minutes.
Prepare your shirt before customization. Wash and dry it first. Lay it flat and slip cardboard inside to prevent paint from bleeding through to the back.
For cutting and reshaping, use sharp scissors or a rotary cutter with a ruler for straight lines. Dull blades tear fabric. Heavyweight cotton (6 ounces or more) holds cuts better than lightweight fabric.
For bleach-based effects, dilute household bleach 1:1 with water in a spray bottle. Works only on dark cotton or cotton-blend tees. Wear gloves, work in ventilation, and test on an inconspicuous area first.
For DTF (Direct-to-Film) transfers, you need a heat press or home iron, a pressing cloth, and high-resolution artwork (300 DPI minimum). Transfers adhere best to 100% cotton; synthetic blends may peel after multiple washes.

Choose your blank shirt carefully. Heavyweight cotton tees (6 ounces or more) hold custom designs better than lightweight options and prevent paint from bleeding through. Oversized cuts align with current streetwear trends and provide more surface area for designs. Vintage or thrifted plain tees add character that new blanks can't match. White, black, and gray provide clean canvases for bold graphics; dark colors hide paint imperfections better than light ones.
Streetwear T-Shirt Design Ideas That Actually Stand Out
The difference between a generic graphic tee and one that commands attention comes down to bold design choices. Streetwear thrives on contrast, asymmetry, and unexpected placement.
Consider oversized back graphics that wrap around side seams or break traditional front-center placement. This signals intentional design.
All-over print designs work when you create a cohesive pattern covering front, back, and sleeves as one unified concept.
Hand-drawn doodles work best when intentionally imperfect. Rough lines and visible pen strokes communicate authenticity that resonates with streetwear audiences.
Text-based designs demand bold, unconventional fonts. Diagonal, vertical, or wrapped placement creates visual interest.
Color blocking with contrasting panels transforms a plain tee into a statement piece. Dye sections of the shirt different colors before adding graphics, or use fabric paint to create bold color sections that frame your design.
Hand-Drawn Graphics and Doodles on Plain T-Shirts
Hand-drawn designs deliver authenticity that printed graphics can't match. The imperfection is the appeal.
Start with a light pencil sketch to map out the design and guide your work.
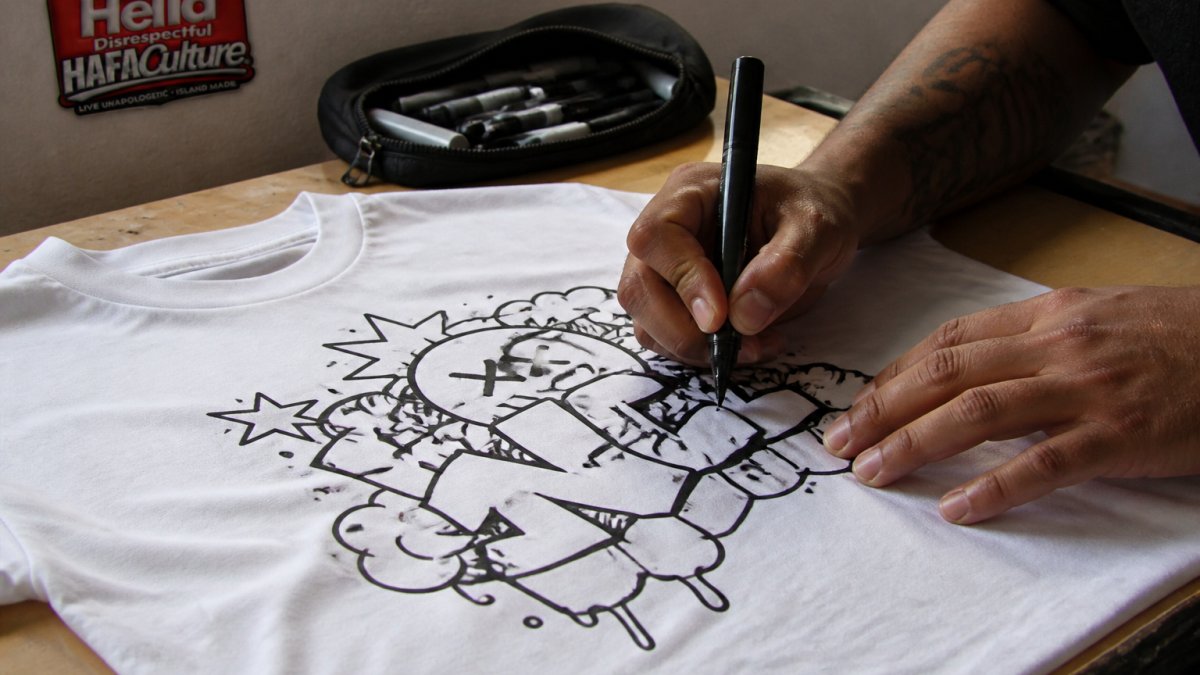
Switch to fabric markers or paint pens once confident in your layout. Press firmly and let each layer dry before adding details.
For fine details, use a thin-tip paint pen. For bold fills, a thick marker moves faster. Layering different line weights creates depth and visual interest.
Heat-set your design with a heat gun or iron on low heat. Hold it 6 inches away for 30 seconds per section. This locks the ink into the fabric fibers and improves durability.
Painting Designs on Shirts with Fabric Paint and Acrylics
Painted designs offer more control than markers and create a softer finish that moves with the fabric. However, success depends on technique, material choice, and proper aftercare.
Choose the right paint. Fabric paint is specifically formulated to stay flexible after drying and won't crack when the shirt stretches. Acrylic paint works but can crack if the shirt is worn or washed repeatedly.
Prepare your shirt and workspace. Lay the shirt flat on a hard surface. Slip cardboard inside to prevent paint bleeding through to the back. This simple step saves your design and protects the shirt's integrity.
Mix paint to the correct consistency. Too thick and it won't spread evenly or dry smoothly. Too thin and it won't cover or will bleed into the fabric. The ideal consistency is similar to heavy cream, thick enough to hold its shape but fluid enough to brush smoothly.
Apply paint in thin layers. Use a foam brush for large areas and fine brushes for detail work. Build color gradually rather than applying one thick coat. Thick paint cracks as the shirt moves; thin layers flex with the fabric. Allow each layer to dry completely between applications.
Heat-set the design to lock it permanently. Use a heat press at 300°F for 3-5 minutes, or a home iron on medium heat (no steam) for 5-10 minutes. Press from the back of the shirt to avoid damaging the design.
Troubleshoot common problems. If paint bleeds into the fabric around your design, the paint was too thin or the fabric wasn't prepared properly. Prevent this by using the correct consistency and cardboard backing. If the design cracks after the first wash, the paint was too thick or wasn't heat-set long enough.
Wash and care for painted designs. Turn the shirt inside out before washing to protect the design. Use cold water and gentle cycle. Avoid bleach and fabric softener, which can degrade the paint. Air-dry or use low heat in the dryer. Painted designs last through 50-100 washes if properly heat-set and cared for.
Safety considerations. Ensure good ventilation when using acrylic paint, as fumes can accumulate in enclosed spaces. Wear gloves to prevent skin irritation. If using spray-applied paint or airbrush techniques, wear a dust mask rated for fine particles. Clean brushes immediately after use with water (for fabric paint) or mineral spirits (for acrylic).
Best Apps for T-Shirt Design Before You Customize
Digital design tools let you preview your concept before committing to a physical shirt. This saves time and materials.
Canva offers pre-made templates and drag-and-drop design elements. You can upload custom artwork or use their library. The interface is intuitive for beginners.
Adobe Express works similarly but integrates with professional design assets. If you're comfortable with design software, this gives more control.
Procreate on iPad lets you draw directly if you prefer hand-drawn aesthetics. Export your work as a high-resolution PNG for printing.
Consider the final output format. If you're using DTF transfers, export as a PNG with a transparent background. This ensures clean transfers without white backgrounds.

Custom DTF Transfers for T-Shirts: The Professional Finish
DTF transfers deliver vibrant, durable prints without minimum order quantities. This method works for one-off designs or small batches.
The process is straightforward. Upload your design in PNG format. Choose your transfer size based on placement. We print it, and you press it onto your shirt using a heat press or home iron.
Hella Disrespectful Clothing offers custom DTF printing services starting at just $2 for single prints. Our gang sheets let you stack multiple designs on one sheet and save significantly. A 12.5" x 54" sheet runs $14 and holds multiple designs.
The vibrant colors and durability set DTF apart from other providers. The ink bonds directly to the fabric, creating prints that last through hundreds of washes.
Heat press application adds $5-$8 if you want us to handle that step. Rush service is available for $5 extra when you need it fast.
Best Blank T-Shirts for Streetwear Customization
The base shirt matters as much as the design. Cheap blanks make even great graphics look amateur.
Heavyweight cotton tees hold custom designs better than lightweight options. Look for 6-ounce fabric minimum. Thicker fabric prevents paint from bleeding through and supports detailed work.
Oversized cuts align with current streetwear trends. A slightly loose fit photographs better and feels more intentional than a fitted tee.
Vintage or thrifted plain tees add character that new blanks can't match. The fabric has already broken in, and the slight imperfections enhance the DIY aesthetic.
Consider neckline style. A standard crew neck is versatile. A dropped shoulder or oversized neck creates visual interest without adding design complexity.
White, black, and gray provide clean canvases for bold graphics. Colored blanks work too but limit your design options. Dark colors hide paint imperfections better than light ones.
Cutting, Reshaping, and Advanced Modifications
Cutting and reshaping transforms a basic tee into something unique. This technique requires precision but delivers striking results.
Plan your cuts before you start. Sketch the design on the shirt with chalk or a washable marker. This prevents costly mistakes.
Cut straight lines with a rotary cutter and ruler for clean edges. Use sharp scissors for curves. Dull blades tear fabric instead of cutting cleanly.
Reshape the neckline by cutting a wide scoop or asymmetrical neck. Seal raw edges with fabric glue or a quick stitch to prevent fraying.
Side seam cuts that expose the undershirt create layered visual interest. Cut parallel lines down the sides and tie them closed for a fitted effect.
Sleeve modifications work well for streetwear aesthetics. Cut off sleeves entirely for a tank top look. Cut diagonal lines from shoulder to cuff for an edgy style.
Combine cutting with painting or DTF transfers for maximum impact. A cut-out section with a custom transfer underneath creates depth and visual complexity.
Customizing plain streetwear tees gives you control over your personal brand. Whether you hand-draw designs, paint details, or use professional DTF transfers, the process starts with intention and the right tools. Hella Disrespectful Clothing's custom DTF printing services make scaling your designs simple, upload your artwork, choose your size, and we handle the rest. Streetwear design trends and techniques continue to evolve, but the core principle stays the same: bold, authentic designs that reflect who you are. Get started with Hella Disrespectful Clothing's custom DTF transfers and transform your vision into wearable art that commands attention.
Frequently Asked Questions
What's the best way to customize a plain streetwear tee without it looking amateurish?
Start with a clear design concept and quality materials. Hand-drawn designs work best when they're intentional and bold, not hesitant. For a polished finish, use custom DTF transfers through services like Hella Disrespectful's DTF Lab, which deliver vibrant, professional-quality prints that won't fade or crack after washing. If painting, invest in proper fabric paint and let it cure fully. The key is committing to your vision and using materials built for clothing, not generic art supplies.
How do I know which customization method will last through multiple washes?
DTF transfers are a durable option when applied correctly. Fabric paint also holds up well if you use acrylic or textile-specific formulas and heat-set them properly. Hand-drawn designs with permanent markers are less durable over time. For longevity, choose DTF transfers or professionally applied prints. Always wash inside-out in cold water and air-dry customized tees to extend their life.
Can I customize blank T-shirts from any brand, or do some work better?
Heavier-weight, 100% cotton blanks work well for customization methods. Thin shirts or high-polyester blends can cause paint to crack or transfers to peel. Look for blanks with a tight weave and substantial fabric weight. Avoid ultra-soft or heavily pre-shrunk blanks, as they can distort under heat or paint application. Quality blanks make the difference between a tee that lasts and one that falls apart after a few wears.
Should I design my customization on an app first or freehand it on the shirt?
For streetwear that stands out, apps let you test layouts and refine designs before committing. Apps like Procreate or Canva help you visualize placement, scale, and color combinations. If you're confident freehand, that raw energy reads as authentic. Many creators combine both: sketch digitally to plan, then hand-draw or use DTF transfers for execution. Design apps also work well if you're uploading your design for custom DTF transfers, ensuring professional results.