

7 Steps to Prepare a PNG for DTF Printing
Last Updated: October 29, 2026
Quick Summary
You need a transparent PNG for DTF printing, saved at 300 DPI at the final print size with the artwork mirrored horizontally. Delete the background pixels rather than painting over them, clean up edges at 400% zoom, and export as PNG with transparency enabled and RGB color mode.
- A 10-inch wide print at 300 DPI needs 3,000 pixels across.
- Mirror your artwork only at the very end, after all edits are done.
- Zoom in to 400% and scan the border of your design before you export.
- A halo invisible against a white canvas will glow on a black shirt.
- Export as PNG with transparency on, RGB color mode, and 300 DPI.
Table of Contents
- Start With the Right File: Why PNG Beats JPG for DTF Printing
- How to Make a Transparent PNG for DTF Printing
- DTF PNG Resolution and DPI: Hit 300 DPI at Final Print Size
- DTF Transfer Artwork Size: Match Pixels to Placement
- How to Mirror Artwork for DTF Printing
- Export Settings and Color Management for Clean Transfers
- Edge Cleanup, Preflight Checks, and Uploading to the DTF Lab
- Frequently Asked Questions
Start With the Right File: Why PNG Beats JPG for DTF Printing
You need a transparent PNG for DTF printing. That's the short answer. JPG files bake a solid background into every pixel, and DTF transfers need clean, transparent edges to press correctly. At Hella Disrespectful Clothing, we see the same problem over and over: a great design ruined because it was saved as a JPG.
Here's why it matters. A JPG has no alpha channel. That means no transparency, no clean cutline, no way for the printer to know where your design ends and the shirt begins. PNG files keep that transparency intact.
DTF printing is a process where your artwork prints onto a film, gets coated with adhesive powder, and presses onto fabric with heat. The film doesn't care how bold your design is. It cares whether your file is clean.
A quick comparison:
| Format | Transparency | Best For | DTF Ready? |
|---|---|---|---|
| PNG | Yes | Logos, graphics, text | Yes |
| JPG | No | Photos | No |
| SVG | Yes (vector) | Simple shapes | Convert first |
| PSD | Yes | Layered edits | Export to PNG |
So before anything else, open your file and check the format. If it's a JPG, convert it. If it's already a PNG, you're ahead of most people.
How to Make a Transparent PNG for DTF Printing
A transparent PNG is an image file where the background is fully see-through, leaving only your design visible. Making one takes a few minutes in almost any design tool.
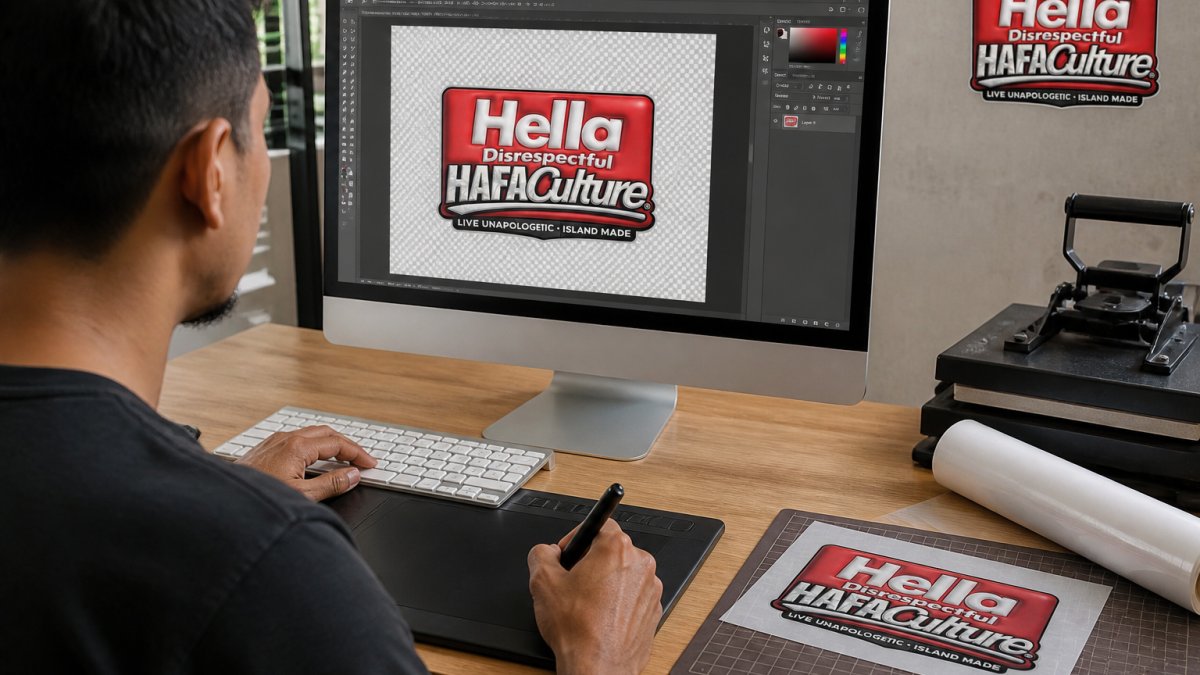
Here's the basic process:
- Open your artwork in your design software
- Select the background using the magic wand or select-subject tool
- Delete the selection so the checkerboard pattern shows through
- Zoom in and clean up any leftover edges
- Save as PNG with transparency enabled
The checkerboard is your friend. If you see it behind your design, the background is gone. If you see white, it's still there.
Watch out: Don't just paint white over the background. That leaves solid pixels that will print as a white box around your design. Delete the pixels, don't cover them.
DTF PNG Resolution and DPI: Hit 300 DPI at Final Print Size
Your DTF PNG needs 300 DPI at the final print size. That's the working standard for sharp, clean transfers. Lower resolution can look fine on screen but prints soft, jagged, or pixelated once the film hits fabric.
DPI means dots per inch, how many pixels fit into every inch of printed artwork. The number that actually matters is pixel dimensions, not the DPI number stored in the file metadata.
Here's the math in practice:
- A 10-inch wide print at 300 DPI needs 3,000 pixels across
- A 12-inch print needs 3,600 pixels
- A 3-inch pocket logo needs 900 pixels
- A 14-inch full back needs 4,200 pixels
Multiply your intended print width in inches by 300 to get the minimum pixel width. Do the same for height. If your file is smaller than that, you have three options: shrink the print size, find a higher-resolution source, or recreate the artwork as vector and export at the target size.
Assessing a file you already have. Open the image and check its pixel dimensions in your editor's image properties or document info panel. If a customer sends a 1,200-pixel-wide logo and wants it 10 inches wide, that's 120 DPI at print size, well below the 300 DPI target.
Why starting big beats scaling up. Design at the final print size from the first artboard. If you start at screen size and scale up later, every edge softens and fine text turns to mush. Start at 300 DPI for the largest placement you might use, then size down for smaller garments.
DPI metadata versus real resolution. Some RIP software reads the embedded DPI tag and some ignores it, sizing the job by pixel count and the operator's print dimensions. Don't rely on the tag.
A common mistake is designing at screen size and scaling up later. That never works. You can't add pixels that were never there. Start big, then size down if needed.
DTF Transfer Artwork Size: Match Pixels to Placement
Size your artwork for the exact spot it will land on the garment. A chest logo and a full back print need completely different dimensions.
Here's a practical guide:
- Pocket or small logo: 3 to 5 inches
- Left chest: 3 to 4 inches
- Youth or medium design: 6 to 9 inches
- Standard adult front: 10 to 12 inches
- Full back or oversized: 14 inches and up
Set your canvas to the final print size before you start designing. That way your pixel count and your print size stay in sync from the beginning.
If you're running several designs on one order, custom DTF gang sheets let you fit multiple graphics on a single sheet and save on cost.

How to Mirror Artwork for DTF Printing
Mirror your artwork horizontally before you export. DTF transfers press face-down onto the fabric, so the design flips when it lands. If you skip this step, your text prints backward.
Most design programs call this "flip horizontal" or "mirror." It's usually one click under the transform or image menu.
Check your file after mirroring. Text should read right-to-left in reverse. If it looks correct on screen, it will look wrong on the shirt.
Here's the fix most guides skip: mirror only at the very end, after all edits are done. If you mirror early and keep working, it's easy to flip it back by accident.
Export Settings and Color Management for Clean Transfers
Export as PNG with transparency on and the highest quality setting your software offers. That's the core of it. The details matter too.
Use these export settings:
- Format: PNG
- Color mode: RGB for most DTF workflows
- Transparency: Enabled
- Compression: None or maximum quality
- Resolution: 300 DPI
Color is where files go wrong. DTF printers use white ink as an underbase, and that white layer changes how colors read on dark fabric. Bright colors can shift. Deep blacks can flatten. Design with contrast in mind, and keep colors bold and separated.
For a deeper look at how transfers behave once pressed, this guide to custom heat transfers walks through the full process. And if you're worried about how the print will feel after washing, here's why DTF prints can feel heavy after washing and what to do about it.
Edge Cleanup, Preflight Checks, and Uploading to the DTF Lab
Clean edges decide whether a transfer looks professional or cheap. Zoom in to 400% and scan the border of your design before you export. Most file rejections and ugly presses trace back to edge problems that were invisible at fit-to-screen zoom.
What to look for at 400%:
- Stray pixels floating outside the design, often left behind by a rough magic-wand selection
- Soft or fuzzy edges from feathered selections or low-resolution source art
- Halos, a fringe of leftover background color, usually white or light gray, hugging the design
- Semi-transparent pixels at the border that are neither fully opaque nor fully clear
Why halos happen and how to kill them. A halo is the residue of a background that was removed imperfectly. When you delete a white background with a tolerance setting that's too tight, the anti-aliased pixels between white and your design survive as a pale fringe. On a dark garment, that fringe prints as a light outline around the graphic.
Semi-transparent pixels and antialiasing. Edges in raster art are rarely a hard line. Software antialiases them by blending the design color with the background color across a one- or two-pixel band. Those blended pixels are partially transparent.
A repeatable edge-cleanup sequence:
- Duplicate the layer so you can compare before and after
- Select the background and delete it, then inspect at 400%
- Contract the selection by one pixel and delete again to remove fringe
- Use a hard eraser at 100% opacity to remove stray pixels
- Check the alpha channel for any gray, semi-transparent band and threshold it
- Toggle a dark background behind the art to make white halos visible
Preflight checklist before upload:
- File is PNG with a transparent background
- Resolution is 300 DPI at final print size (pixel dimensions match inches times 300)
- Canvas matches intended print dimensions
- Artwork is mirrored
- No stray pixels, halos, or semi-transparent fringes at 400% zoom
- Colors look bold and clean against both light and dark previews
- File opens correctly in a viewer other than the one you created it in
Connecting file defects to print symptoms. A white box around the design usually means the background was painted over rather than deleted. Jagged edges point to low resolution or an unhardened alpha edge. An unexpected background means transparency was flattened on export. A faint outline on dark fabric is a halo or semi-transparent fringe.
Once your file passes, you're ready to order. You can upload your PNG for a single DTF print sized to your placement, or add optional services like heat press application if you want it finished for you.


Frequently Asked Questions
Can I use a JPG instead of a PNG for DTF printing?
A JPG will print, but it flattens your design onto a solid rectangle. DTF printing relies on a transparent background so only your artwork transfers and the surrounding film presses clean. JPG also compresses and softens edges, which shows up as fuzz around letters and fine lines. Use a PNG with an alpha channel, or a vector file exported to PNG, so the background stays clear and edges stay sharp.
What resolution should a PNG be for DTF printing?
Set your file to 300 DPI at the final print size. That means a 12-inch-wide back print needs about 3,600 pixels across. Check pixel dimensions, not just the DPI number in the file info, because a small image tagged at 300 DPI still pixelates when scaled up. If your source is under 300 DPI at final size, rebuild it larger rather than upscaling.
Should I mirror a PNG before sending it for DTF printing?
Mirror only if your printer or press workflow requires it, and confirm with your provider first. Many DTF shops flip the file themselves during RIP processing, so a pre-mirrored upload can come out backwards on the shirt. If you press transfers yourself and your heat press setup calls for a mirrored film, flip the canvas horizontally before export and note it on the order.
How do I size a PNG for a DTF transfer?
Size by placement, not by what looks good on screen. Pocket and small logo prints run 3 to 5 inches, youth and medium prints 8 to 9 inches, and adult standard prints 10 to 12 inches, with 14-inch files for oversized statement pieces. Set the canvas to those exact dimensions in inches before you design, then confirm the pixel count matches at 300 DPI.
Getting a PNG right the first time saves you money and reprints. The steps above take maybe fifteen minutes, and they separate clean transfers from messy ones.
At Hella Disrespectful Clothing, our DTF lab handles bold designs with vibrant, high-resolution prints, no minimums, and fast turnaround. We built it for brands, creators, and hustlers who want their artwork to hit hard on the shirt.
Get started with Hella Disrespectful Clothing and press a design that speaks for itself.
