

How to Troubleshoot Common DTG Printing Issues
Last Updated: October 28, 2026
Quick Summary
Most dtg printing issues come from one of four sources: the garment's pretreatment, clogged printhead nozzles, the ink cure, or the artwork file. Work through a symptom-to-cause check, run one test print on a scrap, and change only one variable at a time to isolate the problem.
- Match the symptom to a likely cause before changing any settings.
- Weigh a pretreated shirt weekly against a target gram range of roughly 25-35 grams for a 12 in × 12 in print area.
- Dry pretreatment completely before printing, since printing on damp pretreatment causes bleeding and mottling.
- Confirm the cure on the printed surface with a contact probe or infrared thermometer, not the press dial.
- Wait at least 24 hours before the first wash, then run three to five wash cycles to test durability.
Table of Contents
- Start With a Symptom-to-Cause Diagnostic Check
- Fixing Faded DTG Prints and Washed-Out Color
- Solving DTG Pretreatment Problems on Dark Garments
- Clearing Clogged and Missing Nozzles
- Setting Up a DTG Printer Maintenance Schedule
- Verifying Curing and Wash Durability
- Checking Artwork and Color Files Before You Print Again
- Logging Your Tests and Knowing When to Call a Technician
- Frequently Asked Questions
Your DTG print came out faded, streaky, or with missing lines, and you're not sure whether the problem is the printer, the garment, or the artwork.
We offer custom DTF printing services for personal designs.
Start by identifying the symptom, then consider possible causes. If you are unsure whether the problem is the printer or the method itself, compare it against DTF printing.
Start With a Symptom-to-Cause Diagnostic Check
Before you change any settings, match what you see to a likely cause. Work through this list in order.
- Faded or dull colors: usually pretreatment, ink density, or undercuring
- Streaks or missing lines: usually clogged or misaligned nozzles
- Ink bleeding into the fabric: usually too much pretreatment or a wet garment
Run one test print on a scrap of the same garment type. If the test has the same problem, the cause is in the printer or the process.
Keep a note of each change you make. Changing three things at once makes it impossible to know what worked.
Fixing Faded DTG Prints and Washed-Out Color
Faded prints can have several possible causes, including thin ink coverage, pretreatment, or undercured ink.
Start by checking your ink density settings in the RIP software.
Next, look at the garment. Dark shirts need white underbase ink to make colors pop.
Finally, check the cure. Undercured ink feels fine right after printing and then washes out. We cover curing in detail later in this guide.
Solving DTG Pretreatment Problems on Dark Garments
Pretreatment is a liquid that goes on the shirt before printing. It helps the water-based ink bond to the cotton and keeps the white underbase bright. On dark garments, most print defects trace back to pretreatment before anything else, which is why this is the first variable to lock down.
Common pretreatment mistakes include:
- Applying too little: the white underbase sits on top of the fibers, looks gray, and cracks or washes off
- Applying too much: ink bleeds past the design edge, the print feels fuzzy, and the surface gets stiff and shiny
- Uneven application: patchy spots show up as dull areas or halo rings in the print
A Repeatable Pretreatment Workflow
The goal is the same wet pickup on every shirt, not a subjective "light mist." Most practitioners find that a consistent, measurable routine removes more variables than any single product change. Use this sequence and record the numbers on your log:
- Pre-press the garment first. Press the blank for 5-10 seconds at the press setting you use for that fabric to drive out mill moisture and flatten the weave. Let it cool before spraying.
- Set a fixed application amount. For a typical 12 in × 12 in dark-garment print area, many shops start around 25-35 grams of pretreatment applied with a spray gun or an automatic pretreat machine. Weigh one shirt on a kitchen scale before and after spraying to confirm your gun setting delivers that range, then keep the same distance (usually 6-8 inches) and pass count every time.
- Cover the print area plus a margin. Extend roughly 1 inch past the design edge so the underbase does not sit on untreated fabric, but do not flood the whole shirt.
- Dry completely before printing. Follow the product's stated dry time, and confirm by touch and by eye, the area should feel dry, not tacky. A heat press at low pressure for 10-20 seconds, or a tunnel dryer pass, is a common way to drive off the water. Printing on damp pretreatment is one of the most common causes of bleeding and mottling.
- Press to set the pretreatment. A short press after drying flattens the fibers and gives the ink a consistent surface. Use the same time, temperature, and pressure you recorded for that fabric.
Matching Pretreatment to Fabric
Pretreatment is not one-size-fits-all. Cotton-heavy shirts generally take a standard cotton pretreatment, while poly blends and 100% polyester need a formula and a lower application amount to avoid dye migration and a yellow or gray cast in the white.
Use a test shirt to find your sweet spot, then write the numbers down: grams applied, spray distance, dry time, press time and temperature.
Clearing Clogged and Missing Nozzles
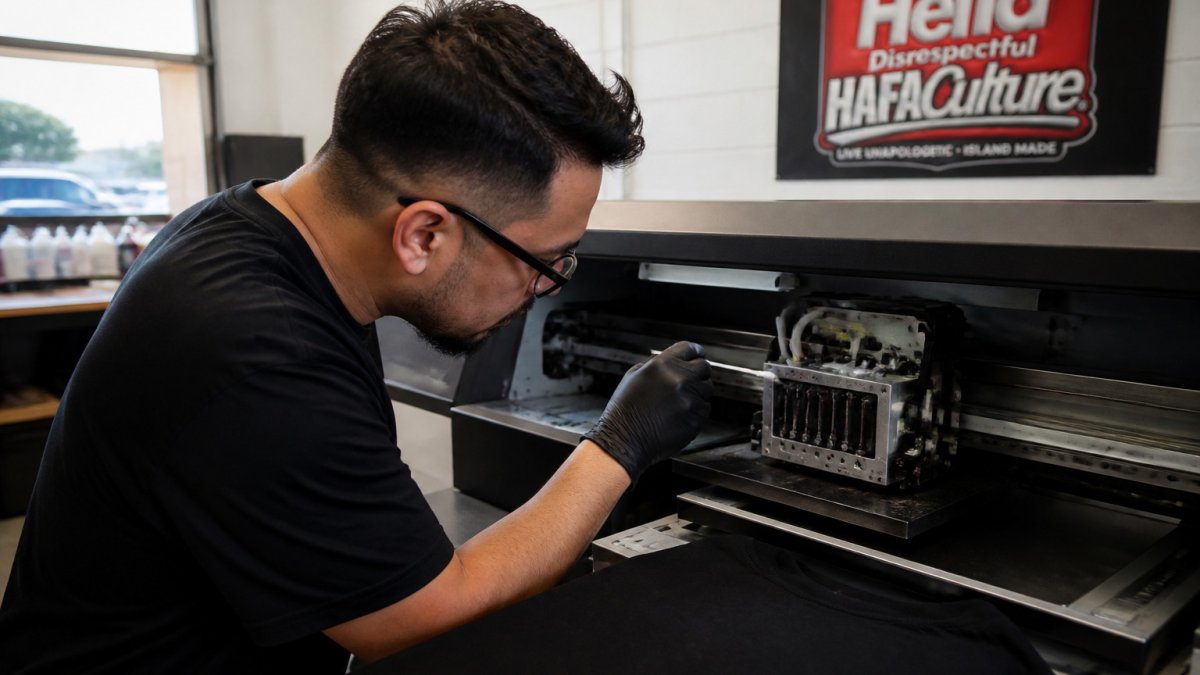
Missing lines, dotted patterns, and gaps in solid color usually mean the printhead has clogged nozzles. The printhead is the part that sprays ink, and its nozzles are tiny. Even a few blocked ones will show up in the print.
Running Nozzle Checks and Head Cleaning Cycles
Run a nozzle check before every major job. Most DTG printers can print a test pattern that shows which nozzles are firing. If you see gaps, run a head cleaning cycle from the printer's menu or software.
If a cleaning cycle does not fix the gaps after two or three runs, stop. Running more cycles can dry out the head. At that point, use a cleaning solution made for your printer and follow the maker's instructions for soaking or flushing.
Safe Printhead Wiping and Capping Station Care
A dirty wiper or capping station can cause clogs even when your ink is fine. The capping station seals the printhead when the printer is idle, and it needs to stay clean.
- Wipe the printhead gently with a lint-free swab and the cleaning solution your printer uses
- Never wipe hard or dry, since that can damage the nozzle plate
- Clean the capping station and wiper according to your printer's manual
Setting Up a DTG Printer Maintenance Schedule
Most clogs and faded prints can be prevented with a simple routine. Set a schedule and stick to it.
| Task | Frequency |
|---|---|
| Nozzle check | Before every job |
| Head cleaning cycle | Daily or as needed |
| Wipe printhead and wiper | Weekly |
| Clean capping station | Weekly |
| Deep clean with solution | Monthly or after long idle periods |
Printers that sit unused for a few days are the most likely to clog.
Keep a log of your maintenance. When a problem returns, the log helps you spot patterns, like clogs after a specific ink lot or after a long weekend.
Verifying Curing and Wash Durability
Curing sets the ink into the fabric with heat. Undercured ink feels fine when you pull the shirt off the press, then cracks, fades, or feels stiff after washing. You can read about why prints feel heavy after washing. The trap is that "the press was set to the right temperature" is not the same as "the ink reached the right temperature", the ink film, not the platen, is what has to hit the cure window.
Measure Surface Temperature, Not Just the Dial
Most DTG ink makers publish a cure window, and a common range is roughly 320-360 °F for a short dwell on a heat press, with tunnel dryers run cooler for a longer dwell. Confirm the number on your ink's technical data sheet rather than assuming. Then verify it on the garment:
- Use a contact probe or an infrared thermometer on the printed area, not the bare platen. A press controller can read 350 °F while the ink film is 40-60 °F cooler because the garment and moisture absorb heat.
- Use a heat-sensitive test strip or temp tape on a scrap print to see the peak the ink actually reached. This is the cheapest way to catch a press that is running cold.
- Check dwell time. A heat press typically needs 30-60 seconds at cure temperature with medium pressure; a tunnel dryer needs the conveyor speed set so the garment spends the ink maker's stated time in the heat chamber. Faster conveyor speed is the most common cause of undercuring in a tunnel.
A Wash-Test Protocol You Can Repeat
A wash test is the only real proof of cure. For practical care steps, see how to wash graphic streetwear tees without ruining the print. Run it the same way every time so results are comparable:
- Print a scrap of the same garment type with the same settings as the production run.
- Wait at least 24 hours after printing before the first wash, ink continues to set as it cools and loses moisture.
- Wash inside out in cold water on a normal cycle with a small amount of detergent, no fabric softener.
- Tumble dry on low, or hang dry, matching the care instructions you give customers.
- Repeat for three to five cycles, checking after each one for cracking, fading, peeling, or a stiff hand feel.
Record the result on the same log you use for pretreatment and maintenance. If a print fails at cycle two, the cure is short; if it passes five cycles but feels stiff, the cure is likely too hot or too long.
Many print shops find that a wash test on a sample batch is the best way to confirm durability before a full run.
Checking Artwork and Color Files Before You Print Again
Sometimes the problem is in the file, not the printer. Before reprinting, check the artwork.
- Resolution: use at least 300 DPI at the printed size
- Color mode: convert to RGB for DTG software unless your RIP expects CMYK
- Thin lines: lines thinner than your printer can reproduce will break up or disappear
Preview the file at the actual print size. Many color problems only show up when you see the design at true scale.
Logging Your Tests and Knowing When to Call a Technician
Keep a simple log for every test. Record the garment brand, the pretreatment amount, ink density, cure temperature and time, and the result after washing. Over time, the log will show you which settings give the best results on which fabrics.
Some problems need a professional. Call a technician if you see any of the following:
- Clogs that return right after cleaning
- Ink leaking inside the printer
- Error codes you cannot clear
Handle cleaning solutions and inks with care. Wear gloves and eye protection, keep the work area ventilated, and dispose of used wipes and solution according to your local waste rules.
Frequently Asked Questions
Why are my DTG prints faded, dull, or washed out?
Faded or dull DTG prints usually trace back to one of three causes: insufficient or uneven pretreatment on dark garments, under-cured ink that breaks down in the wash, or low ink density from clogged nozzles that leave gaps in the design. Start by checking whether the fading appears straight off the press or only after washing. If it appears immediately, look at pretreatment amount and nozzle output. If it only appears after washing, check your curing temperature and dwell time with a heat gauge or temperature strip, then run a test print with a controlled wash cycle to confirm the fix.
What causes DTG print failures on shirts?
Most DTG print failures come from four sources: clogged or missing nozzles, a dirty or misaligned printhead, inconsistent pretreatment, or wrong RIP and print settings for the garment type. Work through them in that order, since clogs are the cheapest to rule out. Run a nozzle check after each change and keep a log of the garment, settings, and result so you can see patterns across failed prints instead of guessing.
How do I prevent DTG prints from fading after washing?
Prevent wash fading by making sure each print is fully cured and that pretreatment is applied evenly and dried completely before printing. Verify cure by washing a test shirt several times and checking for cracking, dulling, or ink lifting at the edges. Keeping your printer on a regular maintenance schedule also helps, because a partially clogged head lays down thinner ink that is more vulnerable to wash damage.
How do I fix uneven or inconsistent DTG prints?
Uneven or streaky DTG prints usually point to a printhead that needs cleaning, a platen height that is not set for the garment thickness, or pretreatment that is applied unevenly. Run a nozzle check first, then wipe the printhead gently following the manufacturer's procedure. If streaks persist, check that the garment is flat and tight on the platen and that the pretreatment layer is uniform before the next print.
